
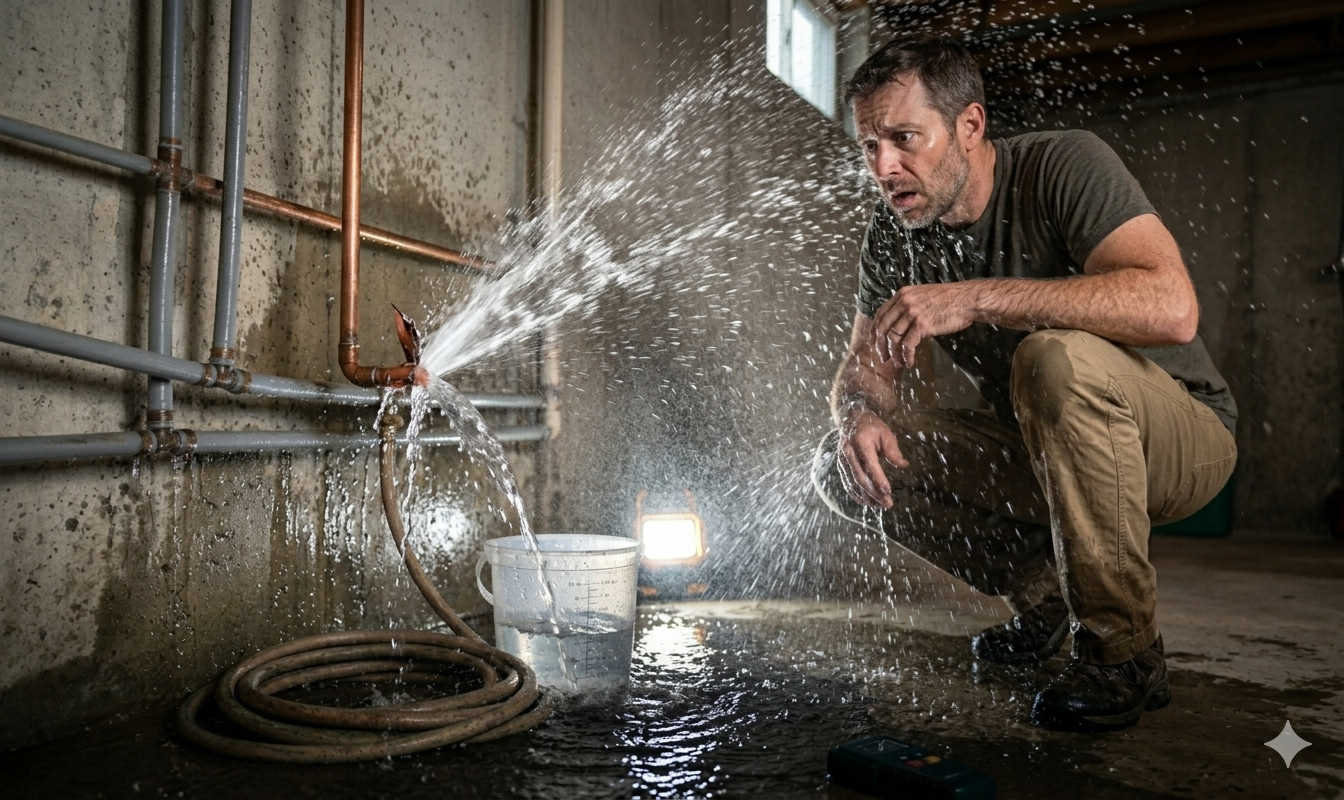
Few home emergencies create panic quite like discovering water gushing from a burst pipe, flooding your home with hundreds of gallons per hour while you scramble to figure out how to stop the destruction. A burst pipe represents one of the most stressful and potentially expensive household disasters, capable of causing tens of thousands of dollars in water damage within hours if not addressed immediately. Understanding what to do when a pipe bursts before you face this emergency makes the critical difference between minor inconvenience and catastrophic damage requiring extensive repairs, mold remediation, and replacement of destroyed belongings.
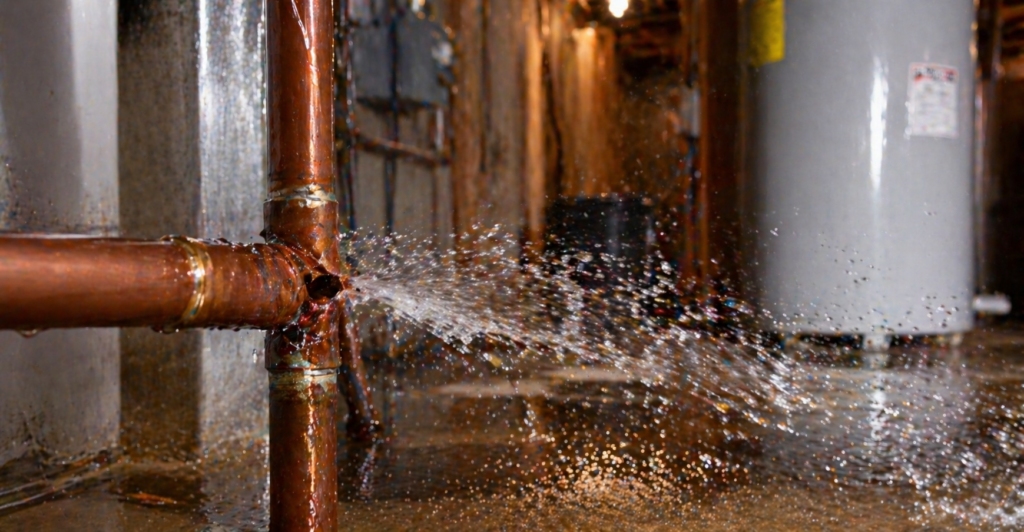
Pipes burst for various reasons including freezing temperatures causing ice expansion that splits pipes, corrosion weakening pipe walls until water pressure breaks through, excessive water pressure stressing connections and joints, and physical damage from construction, settling, or accidents. Regardless of the cause, the result is the same: water escaping under pressure into spaces where it causes rapid, severe damage to building materials, electrical systems, and everything in its path. Across the USA, UK, and Canada, burst pipes affect thousands of homes annually, with winter months bringing the highest risk as freezing temperatures stress plumbing systems. This comprehensive emergency guide walks you through exactly what to do when a pipe bursts, providing step-by-step actions that minimize damage and protect your home and possessions.
The absolute first action in what to do when a pipe bursts is stopping the water flow by shutting off your main water supply valve. Every second water continues flowing from a burst pipe causes additional damage, so this step takes priority over everything else including calling plumbers, moving possessions, or documenting damage. The main shut-off valve location varies by home but typically appears where the water line enters your house, often in basements, crawl spaces, utility rooms, or near water heaters in homes without basements.
The valve usually looks like a wheel-style gate valve or a lever-style ball valve. For wheel valves, turn clockwise until completely closed, which may require many rotations. Lever valves close with a quarter turn, rotating the lever perpendicular to the pipe. If you’ve never located or operated your main shut-off valve, find it immediately as part of basic home maintenance rather than during an emergency when panic and water flow create chaos. Test the valve annually to ensure it operates smoothly, as valves can corrode or seize from years of sitting in one position. If you cannot locate the main valve or it won’t close, most properties have an additional shut-off valve at the water meter, often located in a below-ground box near the street. Closing this valve requires a meter key available at hardware stores, but it stops water flow even when internal valves fail. Once water stops flowing, you can proceed to other critical steps without additional water complicating the situation every second you work.
After stopping water flow, the next critical step in what to do when a pipe bursts involves eliminating electrocution risks by shutting off electricity to affected areas. Water and electricity create deadly combinations, and burst pipes often flood areas containing outlets, appliances, lighting fixtures, and electrical panels. If water is actively flowing near electrical components or pooling where outlets exist, do not enter the area until power is disconnected. Instead, go directly to your electrical panel and shut off breakers controlling the affected zones.
If you’re uncertain which breakers control flooded areas or if water has reached your main electrical panel, shut off the main breaker disconnecting power throughout your home. While inconvenient, this precaution prevents potential electrocution that could prove fatal. Never step in standing water while power remains on, and never touch electrical components, outlets, or appliances in wet areas even if you believe power is off. If your electrical panel is located in the flooded area and you cannot safely access it, call your utility company to disconnect power at the meter outside your home. Once power is safely disconnected, you can work in affected areas without electrocution risk. This safety step also prevents electrical fires that can start when water contacts wiring and components, creating short circuits that generate heat and sparks. While your instinct might be to immediately start removing water, taking thirty seconds to eliminate electrical hazards prevents injuries that could turn a property emergency into a medical tragedy.
An important but often overlooked aspect of what to do when a pipe bursts is draining your plumbing system after shutting off the main water supply. Even with the main valve closed, significant water remains in pipes throughout your home, and this water will continue draining through the burst section until the system empties. Opening faucets throughout your home, starting with those on upper floors and working down to lower levels, allows this trapped water to drain in controlled fashion through fixtures rather than continuing to pour from the burst pipe.
Opening the faucets also relieves pressure in your plumbing system, which is particularly important if the burst resulted from freezing. Ice blockages create pressure buildups that can cause additional pipe failures even after the initial burst, so releasing pressure through open faucets prevents secondary disasters. Turn on both hot and cold taps, and flush toilets to drain tank water. If the burst pipe is in a hot water line, turn off your water heater to prevent it from running dry and burning out the heating elements, which would add appliance replacement to your repair costs. Opening outdoor faucets helps drain exterior lines that may also be vulnerable to freezing. Don’t forget about appliances connected to water lines like dishwashers, washing machines, and ice makers, as these contain water that could potentially leak if their supply lines were damaged by the same conditions that burst your pipe. This draining process typically takes several minutes but significantly reduces the total water volume escaping through the burst section.
Once you’ve stopped new water from entering the system and eliminated electrical hazards, focus your efforts on water removal as a crucial element of what to do when a pipe bursts. Standing water causes progressive damage the longer it remains in contact with building materials, with the first twenty-four to forty-eight hours being critical for preventing permanent harm to floors, walls, and contents. Start by using whatever tools you have available to remove standing water, including mops, towels, buckets, and wet-dry vacuums if you own one.
For significant flooding, a submersible pump available at home improvement stores for fifty to one hundred fifty dollars removes large volumes quickly, pumping water outside or into floor drains. Even simple methods like using a dustpan as a scoop to fill buckets makes progress on water removal. Work from the deepest water toward shallower areas, and remember that carpets and padding hold enormous amounts of water that must be extracted or the materials removed entirely. Furniture and other items sitting in water should be moved to dry areas as soon as safely possible, as prolonged contact causes swelling, warping, and permanent damage to wood, upholstery, and other porous materials. If water has soaked into walls, the drywall and insulation behind it likely need replacement as these materials cannot be adequately dried once saturated and will grow mold if left in place. The faster and more thoroughly you remove standing water, the less damage occurs and the lower your repair costs will be. Professional water extraction services provide industrial equipment that removes water far more effectively than household tools, and many insurance policies cover this service, making it worth calling even as you begin initial water removal yourself.
While working to control damage, don’t forget that documenting the disaster is a vital part of what to do when a pipe bursts for insurance claim purposes. Before removing water or beginning repairs, take extensive photos and videos showing the burst pipe location, water damage extent, damaged possessions, and overall scene. This documentation provides proof of damage for insurance adjusters who may not inspect for days or weeks after the incident, by which time you’ll have necessarily cleaned up and begun repairs.
Photograph the actual pipe failure showing the break location and nature of the damage. Capture images of water levels and spread, damaged flooring and walls, and any personal property affected by water. Video walk-throughs provide comprehensive records showing damage extent and relationship between areas. Document valuables damaged by water with photos showing both the items and the water damage they sustained. Keep all damaged items until your insurance company confirms you can dispose of them, as adjusters may want to personally inspect significant losses. Save receipts for any emergency expenses including water extraction services, equipment rentals, temporary lodging if your home becomes uninhabitable, and emergency repair materials. Write detailed notes about the timeline of events including when you discovered the burst, actions you took, when you notified insurance, and when various service providers responded. This documentation substantiates your claim and prevents disputes about damage extent or your response appropriateness. Many insurance policies require prompt notification of losses, so contact your insurance company as soon as the immediate emergency is controlled, typically within twenty-four hours of discovery.
After addressing immediate safety and water removal concerns, another critical aspect of what to do when a pipe bursts involves locating the actual failure point and implementing temporary repairs until permanent fixes are possible. If you successfully drained your system and removed standing water, finding the burst pipe becomes easier as water is no longer actively spraying. Look for the most damaged area, following water trails back to their source while checking exposed pipes for visible breaks, cracks, or separations.
Once located, temporary repairs can prevent water damage when you restore pressure for limited use or if the main valve fails to completely stop all flow. Pipe repair clamps available at hardware stores fit around breaks and tighten down to seal leaks temporarily. These cost ten to thirty dollars and work on various pipe sizes. For pinhole leaks or small cracks, epoxy putty designed for plumbing repairs can seal breaks temporarily, though this won’t work on actively flowing water. Rubber sheets or old inner tubes wrapped tightly around breaks and secured with hose clamps create makeshift seals. Even wrapping breaks with waterproof tape provides minimal temporary protection. These repairs are not permanent solutions and won’t withstand normal water pressure long-term, but they prevent disasters if pressure accidentally gets restored or provide enough integrity to allow limited water use while arranging permanent repairs. If the burst section is accessible and you’re comfortable doing so, you might cut out the damaged section and install a temporary coupling, though this requires some plumbing knowledge and tools. For most homeowners, temporary sealing and quick permanent repair scheduling represents the best approach.
Comprehensive drying is an essential component of what to do when a pipe bursts to prevent long-term problems including mold growth, wood rot, and structural damage. After removing standing water, affected areas remain saturated with moisture absorbed into building materials, carpets, furniture, and contents. This absorbed moisture must be eliminated within twenty-four to forty-eight hours to prevent mold colonization that creates health hazards and requires expensive professional remediation.
Open windows and doors to promote air circulation if weather permits, and use fans to move air across wet surfaces, accelerating evaporation. Dehumidifiers remove moisture from air, preventing it from simply redistributing to other areas as it evaporates from damaged materials. Run fans and dehumidifiers continuously for several days until moisture meters confirm materials have returned to normal levels. Pull back carpets from tack strips to allow airflow underneath and facilitate drying of both carpet and padding. Remove wet padding entirely as it rarely dries adequately and becomes mold substrate. Baseboard removal allows air circulation behind walls where insulation and framing hold moisture. Monitor for musty odors indicating mold growth beginning, and address any signs immediately with antimicrobial treatments. Professional water damage restoration companies use industrial fans, commercial dehumidifiers, and moisture meters to ensure thorough drying, making their services valuable for significant flooding even if you’ve removed standing water yourself. They can also inject air into wall cavities and under flooring to dry areas you cannot access with household equipment. Insurance often covers professional drying services, and the expense is minimal compared to mold remediation costs if inadequate drying allows growth.
While temporary measures control immediate damage, arranging permanent repairs represents the final critical step in what to do when a pipe bursts. Even with temporary seals in place and water shut off at the main valve, you cannot operate indefinitely without running water, making professional plumbing repair urgent. Contact licensed plumbers immediately, explaining that you have a burst pipe emergency requiring priority service. Most plumbing companies offer twenty-four hour emergency response, though emergency call-out rates typically exceed standard service pricing.
When calling plumbers, describe the burst location, pipe type if known, and any temporary measures you’ve implemented. Ask about response time and whether they stock common pipe materials or if sourcing parts might delay repairs. Get pricing information including emergency service fees, hourly rates, and estimated repair costs based on your description, though actual costs may vary once they assess the situation. If your regular plumber cannot respond quickly, call several companies until you find available emergency service. Check licenses and insurance as even emergencies don’t justify using unqualified contractors who might cause additional problems. While waiting for professional help, keep the main water valve closed and monitor your temporary repairs and drying efforts. If you need water for essential uses like toilets and drinking, you might carefully open the main valve slightly for brief periods to allow minimal use, then immediately close it again, though this risks additional water damage if temporary repairs fail. Professional repairs typically involve cutting out damaged pipe sections and installing new pipe with proper fittings and seals. Depending on location and extent, repairs might cost from three hundred to over one thousand dollars, but permanent professional repairs prevent recurring problems and insurance claims often cover most costs.
After experiencing the stress and expense of dealing with a burst pipe, implementing preventive measures ensures you never need to remember what to do when a pipe bursts again. The most common cause of burst pipes in cold climates is freezing, making insulation your primary defense. Insulate pipes in unheated areas including basements, crawl spaces, attics, and exterior walls using foam pipe insulation that costs just pennies per foot. Seal air leaks near pipes allowing cold air to reach plumbing, and consider heat tape for particularly vulnerable sections.
During cold weather, maintain home temperatures above fifty-five degrees Fahrenheit even when away, and open cabinet doors under sinks allowing warm air to circulate around pipes. Let faucets drip during extreme cold, as moving water resists freezing better than standing water. Drain and shut off outdoor faucets before winter, and disconnect garden hoses that can trap water and cause freeze damage. Beyond freezing prevention, address excessive water pressure that stresses pipes by installing a pressure regulator if your system operates above eighty PSI. Replace old galvanized steel pipes prone to corrosion with modern materials like copper or PEX that last decades longer. Fix small leaks immediately rather than waiting, as minor problems often worsen into major failures. Know your plumbing layout so you can quickly identify problem areas, and maintain clear access to the main shut-off valve. Annual plumbing inspections by professionals catch developing problems before they become emergencies. These preventive steps cost far less than repairing burst pipe damage and provide peace of mind that you’ve done everything possible to protect your home.
A burst pipe can release one to three gallons per minute depending on pipe size and pressure, meaning fifty to one hundred eighty gallons per hour flooding your home. Serious damage to flooring, walls, and contents begins within hours, with the first twenty-four to forty-eight hours being critical. Every minute counts in stopping flow and removing water.
Most standard homeowner’s insurance policies cover sudden and accidental water damage from burst pipes, including repair costs and damaged contents. However, policies typically exclude damage from lack of maintenance or negligence like failing to heat your home adequately in winter. Review your specific policy and maintain documentation of your response and damages for claims.
Temporary repairs like clamps or epoxy are reasonable DIY responses to stop immediate water flow, but permanent repairs typically require professional plumbers to ensure proper materials, techniques, and code compliance. Improper repairs can lead to future failures and may void insurance coverage. DIY temporary fixes followed by professional permanent repairs represent the best approach for most homeowners.
Repair costs vary widely based on pipe location, accessibility, and damage extent. Simple accessible repairs might cost three hundred to six hundred dollars, while pipes in walls, ceilings, or under concrete slabs can exceed two thousand to five thousand dollars including drywall repair. Emergency service fees add one hundred to three hundred dollars to standard rates.
Look where the main water line enters your home, typically in basements near the foundation perimeter, in utility closets, near water heaters, or in crawl spaces. In warm climates without basements, check garages or outside meter boxes. Once located, label it clearly and test annually to ensure it operates properly when you need it.
Knowing what to do when a pipe bursts transforms a potentially devastating disaster into a manageable emergency that you can control and resolve with minimal long-term damage. The critical actions outlined in this guide, from immediately shutting off water and electricity to removing standing water, documenting damage, and arranging professional repairs, provide a clear response plan that anyone can follow even under the stress and panic that naturally accompany discovering water flooding your home. The difference between minor inconvenience and catastrophic damage often comes down to how quickly and effectively you respond in those first crucial minutes and hours after a pipe bursts.
Beyond emergency response, understanding prevention measures including pipe insulation, pressure management, and proactive maintenance helps ensure you never face this emergency at all. The relatively small investment in preventive actions delivers enormous returns by avoiding the thousands of dollars in damage, displacement from your home, and stress that burst pipes create. For the preventive measures that matter most in your specific situation, consider your climate, home age, and plumbing materials, then prioritize actions addressing your greatest vulnerabilities.
While this guide prepares you to handle burst pipe emergencies effectively, remember that professional help from plumbers, water damage restoration companies, and insurance adjusters plays essential roles in complete recovery from these disasters. Your quick action controls the immediate crisis, but expert assistance ensures proper permanent repairs, thorough drying preventing mold growth, and fair insurance settlements recovering your losses. By combining the emergency response knowledge in this guide with appropriate professional support and preventive maintenance going forward, you protect your home from one of the most common and potentially expensive disasters homeowners face.